

Wrapping paper usually features a repeated pattern, and a red plaid pattern is perfect for Christmas nails!
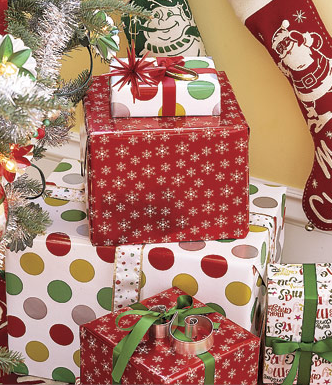
image from countryliving.com

For this nail design five colors were needed. From left to right (all from Revlon): Mon Cherry, Crimson Shimmer, Comet, Carbonite, and Powder Puff.


Step 1: Paint on your base color. This is two coats of Powder Puff followed by a quick drying top coat to speed up the dry time. (Also, since the base color will be mostly covered up, two coats of any color should be sufficient, since streaking isn't noticeable under the colors that will go on top of this.)


For Step 2 (and Step 3 to follow), you will need to cut very thin strips of the blue painter's tape to begin the plaid pattern. In order to cut thin strips that are relatively even, it is easier to cut off a small section of painter's tape from the whole role (about 1 inch/2.5 cm) to then cut into the fine strips that will be used. After you have a small section of painter's tape cut from the roll, decide on how wide you want each strip of tape to be, then using the edge of the scissors as a guide for the width of the strip, press the tape strip onto the scissors so it sticks to one of the cutting-edges of the scissors. By pressing down the strip of tape onto the scissors - rather than holding the piece of tape with one hand to cut with the other - you can judge how little or how much of each tape section you want to cut off.
After cutting your consecutively small strips of tape, lay the strips down on each nail in a pattern where the negative space between the tape strips will repeat in a small-large pattern, where the small section is where Carbonite will be painted, while the large section is where Mon Cherry will be painted. Remember to paint one nail at a time, using first one color then the other, so that you can peel off the painter's tape as soon as you are done painting a nail to ensure a clean edge (that the nail polish will not dry and pull up with the painter's tape).


Step 3 uses the same small strips of tape as Step 2. Here you will lay the strips of tape going in the opposite direction as the strips in Step 2, so as to create the plaid effect. The easiest way to make sure the tape strips you are laying down go in the opposite direction of the original tape strips is to choose one or two main stripes of nail polish that you painted on in Step 2 and try to get these new tape strips to run perpendicular to those stripes, creating 90 degree angles.
Step 3 is the last application of color and uses the tinted/glitter polishes to lay over the other colors, so as to show the pattern through the polish to achieve the plaid look. If you are not using these specific Revlon polishes, look for polishes that are tinted/jelly-finish rather than a creme finish, so as to achieve the look of a real plaid pattern.
And here is the finished product:

Once you think your layers of polish are sufficiently dry, add a top coat!
So what do you think of this Christmas nail design? What are you wearing on your nails for Christmas?
This is great!! I love it!
ReplyDeleteI tried to do the candy cane in green with red stripes. But since I used Zoya Rina and Zoya Holly, it reminds me more like a christmas tree with red garland lol
This is lovely :)
ReplyDeleteI enjoy tape manicures but I'm not patient enough to cut such thin strips :p
So pretty! Love it!
ReplyDeleteOMG THIS IS SO GORGEOUS. Can you tell I mean it? Thanks so much for the awesome inspiration!!!!!
ReplyDelete