

The manicure for Days 9 and 10 of the Twelve Days of Christmas is a manicure inspired by those decorative/stylized Christmas trees that are made of lights.

image from wikimedia.org
This design only takes two nail polishes to complete: the base color and the nail art color.

I chose to use OPI's All A-bordeaux the Sled! (from the Holiday 2009 collection) and OPI's Bring on the Bling.

Step 1: lay down the base color.

This is three coats of All A-bordeaux the Sled! with one coat of top coat over it.

Step 2 will begin the tree.

Take two strips of blue painter's tape and lay them down on the nail so the tape pieces will block off the area that will be the first/top-most part of the tree. You'll want the tree tip to start at about the middle of your nail, where the first stripe that makes up this stylized tree will end a little distance from the side of your nail (consider that the third stripe that is going to make up this tree will need to go a bit farther towards the edge of your nail, without touching the edge, so remember that when painting this stripe).
If you find it more helpful, you can block off the two ends of the stripes to get perfectly straight edges. The nice thing about using a dense glitter polish for the stripes of the tree, is that the glitter polishes tend to not spread out or drip down the way regular nail lacquers do (when trying to paint inbetween blue tape).

Step 3 will be a straight line that makes up the second line of this tree art design.

Use the first strip of painter's tape to block off the topmost edge of this line, where you'll put the tape just over the end of the first line, so the two ends will meet at the edge of where the first line is. The second piece of tape will block off the bottom edge of this line, so try to run the second piece of tape parallel to the first. For the third piece of tape, it will go perpendicular to the other two, where it just starts to cover the tip of the Christmas tree design, so that this second line will not go as far to the right as the first line.
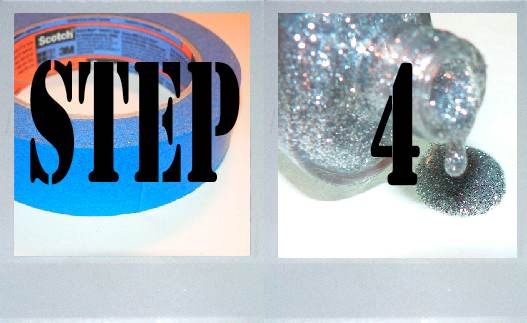
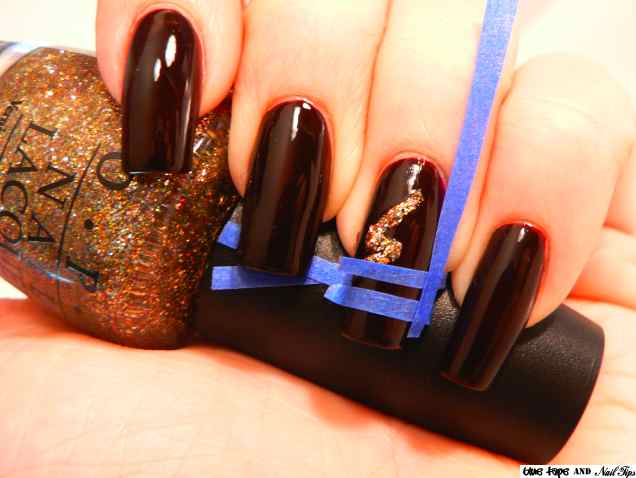
Step 4 mimics the first line, except you will be connecting this third line of the Christmas tree to the second line you made.

Have the pieces of tape block off a space for the line, where the top point of this line touches the end of line two. This third stripe of the tree will go a bit farther to the left than the first line, so when laying the last piece of tape that will go lengthwise along the nail, bring it farther to the left so that when this line is complete, it will go farther to the edge of the nail than the first line.

Step 5 is adding the bottom line to this tree design.
This will be a line that will go straight across your nail, similar to the second line that makes up this tree (shown in Step 3). For this part of the Christmas tree, you will want this line to go further right than the top point of the Christmas Tree, so remember that when you are laying down the last piece of tape that runs the length of the nail (for this step).

Step 6 creates the base of the tree.

This step will be creating a little block/square shape for the base of the tree. The first piece of tape you lay down will be parallel to the bottom line of the tree shape, where then two other piece of tape will run perpendicular to the first piece of tape, marking off the square shape, leaving the top edge open to touch the glitter of the fourth line of the tree.
Once Step 6 is done, add a top coat over the design, and you have a finished look!
This is a nice stylized design that can be done on all your nails (maybe in alternating shades of red and green over a silver background?), or just as I have done, as an accent nail.
This concludes Days 9 and 10 of the Twelve Days of Christmas manicures.
On the ninth day of Christmas my true love gave to me
nine ladies dancing
eight maids a milking
seven swans a swimming
six geese a laying
FIVE GOLDEN RINGS
four calling birds
three french hens
two turtle doves
and a partridge in a pear tree.
On the tenth day of Christmas my true love gave to me
ten lords a leaping
nine ladies dancing
eight maids a milking
seven swans a swimming
six geese a laying
FIVE GOLDEN RINGS
four calling birds
three french hens
two turtle doves
and a partridge in a pear tree.
I love this design! It looks gorgeous!! :D
ReplyDeleteOh, I love that bordeaux!
ReplyDeleteThis is very cute but looks so complicated!
ReplyDeletewow, I love it!
ReplyDeleteMerry Christmas :)
This tutorial is really good. I like the final look =).
ReplyDeleteMerry Christmas to you =)
I think this is my favorite :)
ReplyDeleteThis is really beautiful. Simple and classy.
ReplyDeletethat's so cool!
ReplyDeleteLove this! Super cool look. Thanks for sharing
ReplyDeletelovely nails♥
ReplyDeletehttp://jennisfashion.blogspot.com/
Lovely!! very nice!!
ReplyDeletehttp://maartje-busyfunlife.blogspot.com/