Monday, December 12, 2011

Holiday Glitter Swatches: WnW, SH, OPI, SOPI


This holiday season many companies - many more than last year - came out with glitter polishes. Most are limited edition polishes, so they are only available while there are still bottles left, and after that they can only be found on internet sites (usually marked up in price).

So in case you are still undecided about picking up some of these glitter polishes at your local beauty supply or cosmetics stores, I thought I'd compile some comparison swatches so you can get a better look at these glitter polishes.

On to the swatches:


On the index and middle fingers is a single layer of Back Alley Deals, with the right-most nails having two layers. Every other finger also has a half-coat of OPI Alpine Snow - Matte so you can see a bit more clearly how two coats doesn't give complete coverage because the white polish still shines through the purple glitter.

Back Alley Deals consists of fine violet glitter with less magenta hexagonal glitter pieces in a clear base.


One coat on left-most nails (index and middle fingers), with two coats on right-most nails. Alternating half-coat of OPI Alpine Snow - Matte used to show the glitter density.

Fine silvery-black glitter with larger, sparser hexagonal glitter that is silver but shines multi-colored in a clear base.


Two coats on one coat on left two nails, two coats on right two nails. Alternating half-coat of base color in OPI Russian Navy - Matte.

This is one of the denser glitter polishes out of the many glitter polishes available. A dupe to Lorelei's Tiara by China Glaze, Showgirl Chic is made up of small silver glitter with larger blue hexagonal pieces of glitter spread throughout in a clear base.


One coat on left two nails, two coats on right two nails. Half-coat of base color on alternating nails in OPI Russian Navy - Matte.

Bling-tastic consists of tealy-blue glitter that is small (but not micro), with larger silver hexagonal glitter in a clear base. This polish is less dense than most of the other glitters seen this holiday, because the small blue glitter is not micro-glitter, and so it is less dense throughout the clear base than the other small glitter pieces used in the other lacquers.


One coat on left two nails, two coats on right two nails. Alternating half-coat of under-color in OPI Russian Navy - Matte.

Cost is No Issue is made up of fine turquoise glitter with larger blue/teal glitter in a clear base. This one almost covered completely in two coats.


One coat on left two fingernails, two coats on right two fingernails. Alternating half-coat of base color in OPI - Suzi Skis in the Pyrenees (Suede).

Fresh Frog of Bel Air is made up of small green glitter with larger hexagonal pieces of glitter in silver, all in a clear base. This did not cover fully in two coats.


One coat on left two nails, two coats on right two nails. Alternating half-coat of base color in OPI - Suzi Skis in the Pyrenees (Suede).

Good Tidings We Bling (the bottom of my bottle has an excalamtion point at the end of Bling, while Sephora's online listing does not) is made up of small red and green glitter with large red and green hexagonal glitter in a clear base. There is also medium-sized black hexagonal glitter!


And now for some comparisons:

First we have Wet and Wild Diamond in the Rough versus Sephora by OPI If You've Got It, Haunt It.


Following the same one coat then two coat pattern, the one coat on the left-most fingernails exemplify how these two polishes are different. On the index and ring fingernails is Diamond in the Rough and If You've Got It, Haunt It is on the other two. Since Diamond in the Rough seems to be a dupe for Some Like It Haute by China Glaze and Dancing in the Dark by Deborah Lippmann and Sloane Square by Nails Inc, I thought it'd be a good comparison polish to the SOPI since If You've Got It, Haunt It used to be only available from the Halloween 2010 collection from Sephora, and the other colors were mentioned as being possible dupes to the SOPI.

In the above picture, you can see that If You've Got It, Haunt It differs from Diamond in the Rough with having the same fine black/silver glitter, but with just slightly bigger black glitter and equally big silver glitter that only flashes blue and green (with very slight orange/red flashes at some angles) in a black-tinted base. For some reason, this combination makes this glitter layer more completely, so that two coats of the SOPI are all you'll need, while the Wet and Wild could use a third coat.


On the index and ring fingers are one coat and then two coats of Bling-tastic with Fresh Frog of Bel Air in one coat on the middle finger and two coats on the last nail. Bling-tastic looks like a dupe for Gone Gonzo! by OPI, and since Fresh Frog of Bel Air is from the same collection, I thought it would be interesting to compare.

The main differences between the two seem to be that Bling-tastic is more dense, wile Fresh Frog of Bel Air has more silver glitter per brush-stroke. Both small glitters and larger hexagonal glitter is the same size between both polishes.


If you're in the market for glitter polish, the Wet and Wild Ice Baby limited edition collection has nice dupes to more expensive glitter polishes that look exactly the same (the three polishes I showed look awfully similar to the Dance Music trio Deborah Lippmann just released). Out of all the polishes swatched above, I found the Sephora by OPI to have the easiest brush to hold and polish with. The Wet and Wild were the most awkward to polish with because of the short square handle. Bling-tastic and Fresh Frog of Bel Air were the least dense and would need at least three coats to be opaque, while Cost is No Issue and Showgirl Chic are dense enough to be worn at just two coats. Price wise, the Wet and Wild were the cheapest and the Sephora by OPI (which is only available online) is the most expensive, but the OPI and Sally Hansen were both about the same cost (which makes the Sally Hansen seem expensive for a drugstore polish).

If you're still looking, the fact that there are many dupes within the different Holiday glitter collections from the different polish labels makes it easier to find what you are looking for.


I hope you found these swatches helpful and that you've already stocked up on glitter polishes for the coming winter since the spring polishes are already showing up! Thanks for stopping by!

Friday, November 11, 2011

Nail Polish Xmas Gifts featuring Nars and DL


...or Wish List...


images from Vogue.com

Can't think of a great gift to give the person who has everything? (Or even for the person who doesn't.) Marc Jacobs and Nars have teamed up to create these two great sets for the holiday season!

Each set features a newly mixed nail polish (created by Nars just for this collaboration) and a pair of soft, warm fingerless gloves from Marc Jacobs. Each lacquer is meant to complement the shade of the gloves. Violet cashmere gloves with a dark lilac polish or black cashmere gloves with a blackened-gold lacquer.

$52US for each set. Exclusively at Nars 413 Bleecker Street, New York.

Which will you be picking up? As a gift, or for yourself?


And Deborah Lippmann has a new trio of polishes out for the holidays!


image from shop.nordstrom.com


The "Dance Music" Holiday Mini Trio features three new colors: (From left to right)
  • Just Dance - described on the Nordstrom website as a "brilliant aqua - glitter"
  • Dancing in the Dark - described on the Nordstrom website as "disco ball in the dark - glitter"
  • Flash Dance - described on the Nordstrom website as an "electrifying orchid - glitter"
A Nordstrom Exclusive, this set retails for $29US. Get it while you can!


Do you already have a full Christmas/Holiday Wish List? Think you might add any of these to it?


*Images and details for this post were taken from the following websites: http://www.vogue.com/vogue-daily/article/at-your-fingertips-nars-marc-jacobss-cool-new-collaboration/ and http://shop.nordstrom.com/s/deborah-lippmann-dance-music-holiday-mini-trio-nordstrom-exclusive/3240402*

Sunday, October 30, 2011

Glowing Ghosts


Here's a simple Halloween Nail Design:


Inspired by Glowing Ghosts!


image from blog.wholesalesuppliesplus.com


You'll need three polishes for this manicure:


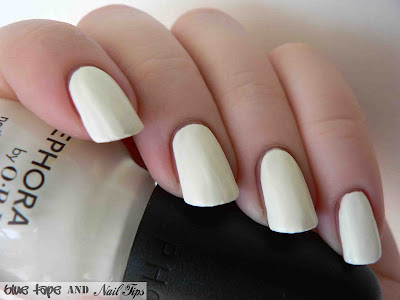
For the glow-in-the-dark polish Sephora by OPI Full Moon was used, for the base color OPI Alpine Snow - Matte was used, and for the detailing Sally Hansen Black Out was used.


The first step is comprised of Steps 1 and 2.


For Step 1, paint on your base color that will go below the glow-in-the-dark. Here, one coat of OPI Alpine Snow - Matte was used. (You will need to do this step for most glow-in-the-dark polishes because they tend to be sheer. If you are using a tinted glow-in-the-dark polish, you can use a background color that is the same as the glow-in-the-dark tint to help strengthen the look of the color.)

Step 2 is to paint on your glow-in-the-dark color. In order to get white colored ghosts (when the lights are on) I used Sephora by OPI Full Moon from last year's Halloween Collection. Full Moon is less sheer and more of a cream glow-in-the-dark, but to get full coverage you need at least 3 coats, so a base coat was applied and what you see above is only 2 coats of Full Moon.


Here is where the blue painter's tape comes in!


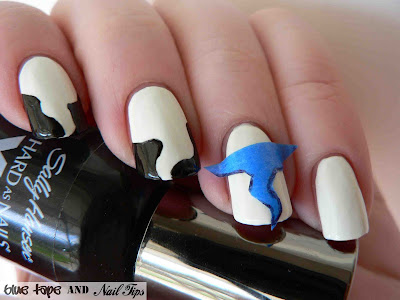
For Step 3, using the corner of a card or piece of paper (or any 90 degree angle tool/triangle/ect.) draw a triangle on the side of a piece of blue tape, where the triangle would cover about half of your nail length.

Next, inside the triangle you have just drawn, draw a wavy line where one end of the line comes from the edge of the tape and the end point of the line meets the tip of the triangle. Then draw another wavy line inside the triangle along the opposite side of the triangle. This will form a "wavy lined" triangle that will mark off the beginning of the head of the ghost to its tail. (See the above image for a better reference.)

Cut out the wavy lined triangle and place it upside down on your nail. You will be using the sides of the triangle (not the base) to tape off the area to be painted with the detailing color.


After following Step 3 for all your nails, use a dotting tool to add first the eyes (one dot for each eye), then the mouth (which is an combination of first dotting a point, then dragging the point down and back up to form an oval shape).


Step 5, wait until the black is dry! And then add top coat.


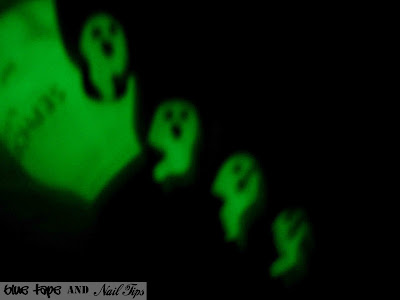
And when you turn off the lights...


You have your glowing ghosts!


Have you already chosen your Halloween manicure?

Thursday, October 13, 2011

ND 20: ParentheSeas


Nail Design 20 is a ParentheSeas manicure!


image from bettertrading.blogspot.com


Inspired by ocean waves...in a mirror image, don't they look like parentheses?


For this manicure you'll need just two colors: Orly Royal Navy and Zoya Phoebe (which is a matte polish).


Step 1 is two coats of Orly Royal Navy. While the nail line is still visible at two coats of polish (especially when you take Macro photos of said VNL), you will be layering the second polish on top, so the VNL isn't noticeable at the end of the manicure.


Step 2 is where the blue painter's tape comes in. For this nail design, you'll also need some type of tool that makes circles. I used a circle template (you know the green, clear kind with varying sizes of circles cut out? They can usually be found at Office Supply Stores or Art Stores). A compass would work just as well.


The pattern shown above is the finished idea where there are 5 concentric circles that you can draw on a single length of tape (if you have a wide enough roll of tape), or you can draw half circles, where the diameters of each of the circles meets the edge of the side of the tape.

You will be making a total of 3 sets of concentric circles that will be split up to cover all 10 nails. Each 'pair' of nails will have opposite parts of the circle, where one nail will have the cut-out tape circles 1, 3, and 5 on it, while the other nail will have circles 2, 4, and the outside of circle 5 (as pictured above).


For Step 3, following the process listed in Step 2, every four nails will get a whole set of concentric circles (and your thumbs will split one set of concentric circles, leaving left-over strips of tape). By this math, each pair of nails will get one half of the circles, while the other pair of nails will get the other half of the circles.


Here you can see on the last nail how the actual pattern looks with the tape. On this nail, the outer-most circle is not really a circle but is really the square that is left around the last circle (circle 5). On the opposite nail, the last circle does not touch the edge of the finger, so any of that excess space is painted over with the second color (Phoebe).


And now you are finally at Step 4!


Here you will especially need a top coat, because if you used Zoya Phoebe as your second/layering polish, the matte finish tends to want to stick to the tape and pull up when you are pulling off the tape. A top coat helps smooth out those rough edges left over.

So there you have it! Your own ParentheSeas manicure!

As a tip for drawing the circles, I recommend pencil because even sharpie/permanent marker doesn't seem to dry completely, and will then smear into the polish when you paint over the tape. Also, I found it easier to cut the circles out with scissors rather than an x-acto knife/box cutter, so you may want to practice cutting out a small circle and following the curved line you've drawn to see which tool you prefer.

Also, given the temperamental nature of matte polishes, while I personally love the pairing of Phoebe over Royal Navy, I would recommend using another color to layer such as China Glaze Towel Boy Toy, which looks almost identical to Phoebe but without the matte finish.

So, given that this nail design is a bit more complicated than some of the other nail designs I have shown you in the past, do you think you'd try this?

The New American Apparel Polishes!

American Apparel just launched three new metallic lacquers perfect for the coming holiday season (or anytime)!

From left to right the new shades are Silver Jazz, Gold Flash, and Bronze Dash. These are certainly different finishes than the creme polishes that American Apparel has previously released.

They recently added neon polishes to their collection, along with a few other shades that weren't in their first or second wave of releases. Here are a few of their other new shades:


pictured above - Angeline


pictured above - Imperial Purple


pictured above - The Valley


pictured above - Sunset Blvd


pictured above - Sunshine State

All of their polishes are $6US a bottle. There are a few other new colors (or at least ones I haven't seen before), like a new gray shade called 7th and Alameda.

I'm quite excited to check out these new shades the next time I go to American Apparel. The Valley looks like a beautiful blue shade, and the new metallic shades are quite exciting. I love the bright look of Sunshine State, but I think that's a funny name for a polish that's supposed to be inspired by Los Angeles/California, since 'Sunshine State' is the nickname for Florida, while California is the 'Golden State'. Well, California certainly gets a lot of sunshine considering that it was a cloud-free day today and the average temperature in LA was 98 degrees Fahrenheit/37 degrees Celsius.

If you'd like to check out any of these new shades or any of their original lacquers, visit your local American Apparel store, or by them online Here.

*Images in this post were gotten from American Apparel's PR and their website.*

Tuesday, October 11, 2011

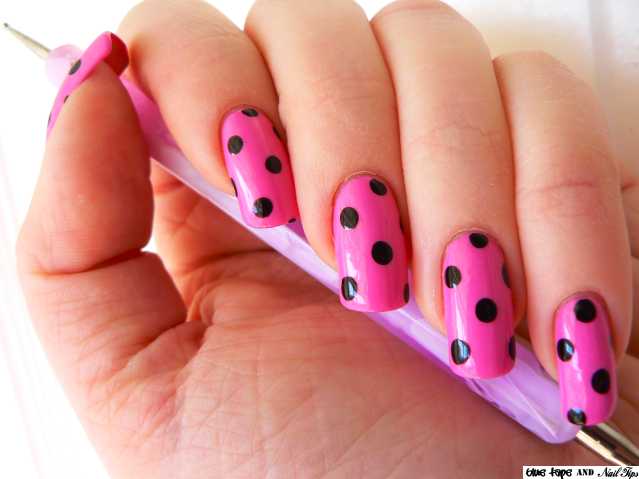
BlkonPnk Polka Dots with Born Pretty

I have a second set of dotting tools from the Born Pretty Store, and what better use of testing dotting tools than trying out a Polka Dot Pattern?


For Nail Design 19, I was inspired by vintage Polka Dot patterns on fabric.


images from pixelscrapper.com and onthedotcreations.com

Though I don't recall seeing black polka dots on a pink background before, I thought the two colors contrasted nicely, so that the dark black polka dots stand out strongly against the soft pink hue.


The two polishes used were Bubblegum Pink from Sally Hansen and Black Out from Sally Hansen.


These were the dotting tools I used:


All of the polka dots were put on using the same dotting tool end so they would be roughly the same size to achieve a more even pattern.


Step 1, following base coat, paint on two coats of the base color and let dry. (Remember, to speed up drying time you can use a quick-dry top coat after painting on your base color.)


Get out your roll of painter's tape and cut off even, thin strips of tape. The number of strips per nail needed will depend on the length of your nail and how close together you are spacing the dots.

It is easier to cut even strips of tape by using a large pair of scissors and cutting width-wise across the roll of tape (in the same direction you'd use to separate a piece of tape from the roll by ripping it across, rather than lengthwise along the roll of tape). For each thin strip, roll out a small section of tape and press it down on the inside edge of the shears so you can see how wide the piece of tape you are going to cut will be. Then cut the piece of tape!


To begin laying down the pieces of tape on your nail, start at the upper edge of your nail bed, going in a diagonal direction. The angle doesn't matter, as long as each piece you lay down on your nail after the first piece goes in the same direction and is parallel to the last piece put down.

Once you have your nail covered with strips of tape going in one direction, starting at the top of your nail again, place a piece of tape perpendicular to the first piece of tape you laid down so that the two pieces of tape form a 90 degree angle.

Continue in the same pattern you did before, laying down strips of tape that are parallel to this (other) first piece of tape so that you are forming squares with the other pieces of tape that were already laid down.

Once you have your taped-out grid laid down, use your dotting tool to place dots in the center of each blank square created by the tape strips.


Just repeat Step 2 on each nail and there you go! Polka Dot Patterned Nails!


Just add top coat and you are ready to go! Simple vintage nails in 3 steps. (And for a more vintage look you can use colors like navy blue, red, or brown for the background and cream or white for the polka dots.)


Have you ever tried Polka Dot nails before?


*Supplies in this post were provided by the company or PR firm in exchange for an honest review. For more information about this blog's policy on reviews and supplies, please refer to the Disclosure Policy at the bottom of the page.*